My Schedule
The My Schedule section allows users to view and manage all activities assigned to the current user.
My Schedule Management
Accessing the List
To access the activity list, navigate to:Activities → My Schedule
When entering this section, the list of activities assigned to the current user will be displayed.
From this screen, it is possible to review activities, apply filters, group information, and access the details of each record.
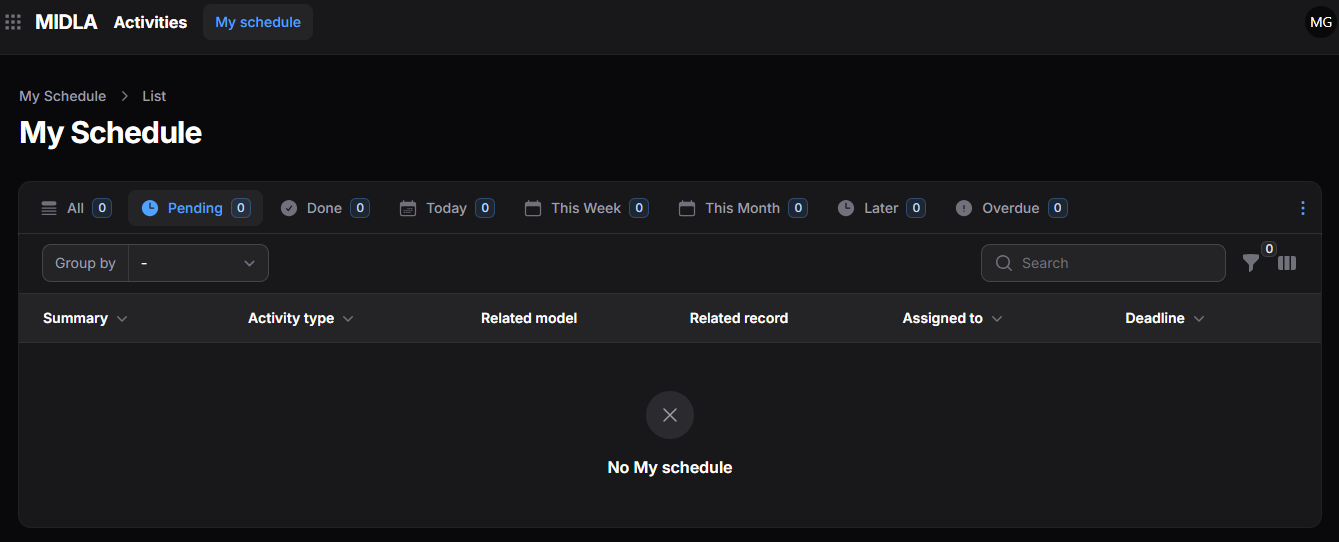
Figure 1. My Schedule list
List Views
The available views allow activities to be displayed according to different statuses and due dates, making organization and tracking easier.
Figure 2. Available views in My Schedule
Available Views
- All: displays all activities assigned to the user.
- Pending: displays pending activities.
- Completed: displays completed activities.
- Today: displays activities due on the current day.
- This Week: displays activities due within the current week.
- This Month: displays activities due within the current month.
- Later: displays activities due after the current month.
- Overdue: displays overdue activities that are still pending.
Available views can be managed from the Action Group (⋮) menu located at the top-right corner of the list.
Each view has its own configuration menu. From this menu, the following actions are available:
- Apply View: applies the selected view.
- Remove from Favorites: removes the view from favorites.
- Set as Default: sets the view as the default view.
The Reset option allows restoring the default view configuration.
List Tools
The activity list includes tools to organize, group, and locate information.
Figure 3. My Schedule list tools
Allows activities to be organized using different grouping criteria.
Allows activities to be located using keywords.
Allows applying specific search criteria to refine results.
Allows selecting, displaying, and reorganizing the visible columns in the list.
List Information
The activity list displays the main information of each registered activity.
Figure 4. My Schedule list information
Each row represents an activity and includes the following information:
- Summary: title or short description of the activity.
- Activity Type: category or type of assigned activity.
- Related Module: system module to which the activity belongs.
- Related Record: specific record associated with the activity.
- Assigned To: user responsible for the activity.
- Due Date: deadline established for completion.
Depending on the system configuration and user permissions, additional columns such as Company, Created By, Creation Date, and Update Date may also be displayed.
Create an Activity
Activities are registered from the Chatter of any record within the system.
To create a new activity:
- Access the desired record.
- Open the Chatter.
- Click Schedule Activity.
Activity Scheduling Form
When creating a new activity, a form will open where the corresponding information can be entered.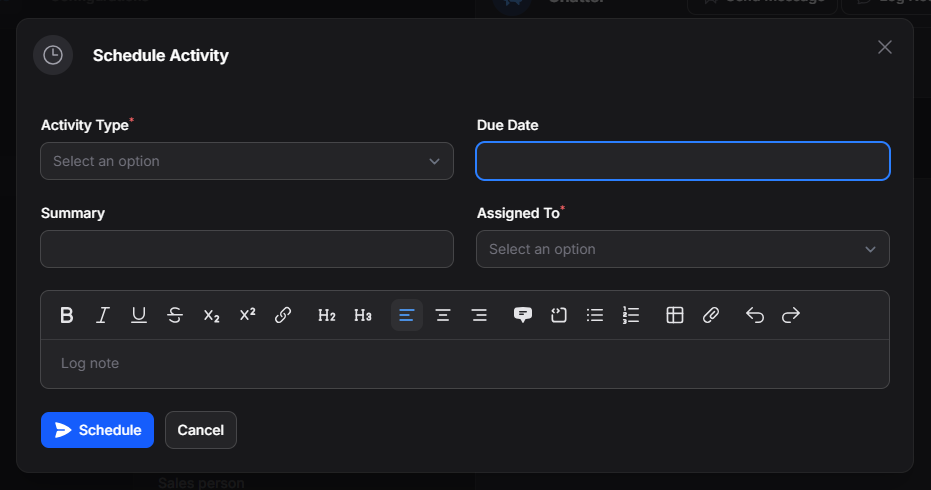
Figure 5. Activity creation form
Available Fields
- Activity Type: allows selecting the type of activity to perform.
- Meeting: for scheduling meetings.
- Exception: for recording exceptional situations or special follow-ups.
- Pending Task: for general pending tasks.
- Call: for phone calls or contact actions.
- Due Date: deadline for completing the activity.
- Summary: title or short description of the activity.
- Assigned To: user responsible for carrying out the activity.
- Logged Note: space for recording observations or additional information.
Available Actions
Once the information is completed, the following actions will be available:
- Schedule: saves and schedules the new activity.
- Cancel: cancels the operation without saving changes.
Activity Record
Once created, the activity will be recorded inside the corresponding record’s Chatter, where its main information can be viewed.
Visible data includes:
- Activity: assigned activity type.
- Assigned To: responsible user.
- Due Date: deadline.
- Summary: title or short description.
- Note: observations recorded during creation.
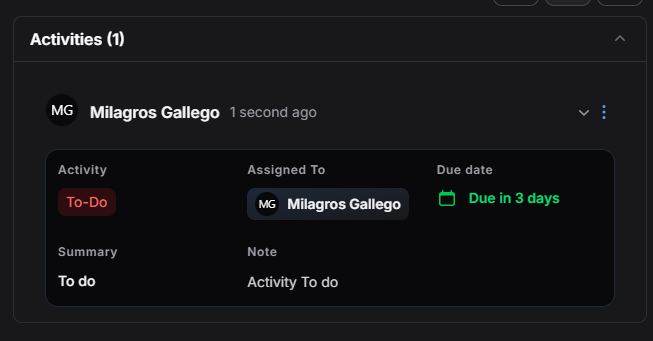
Figure 6. Activity recorded inside the Chatter
Additionally, the activity will automatically appear inside the Activities module, under the My Schedule section, allowing centralized tracking and management.
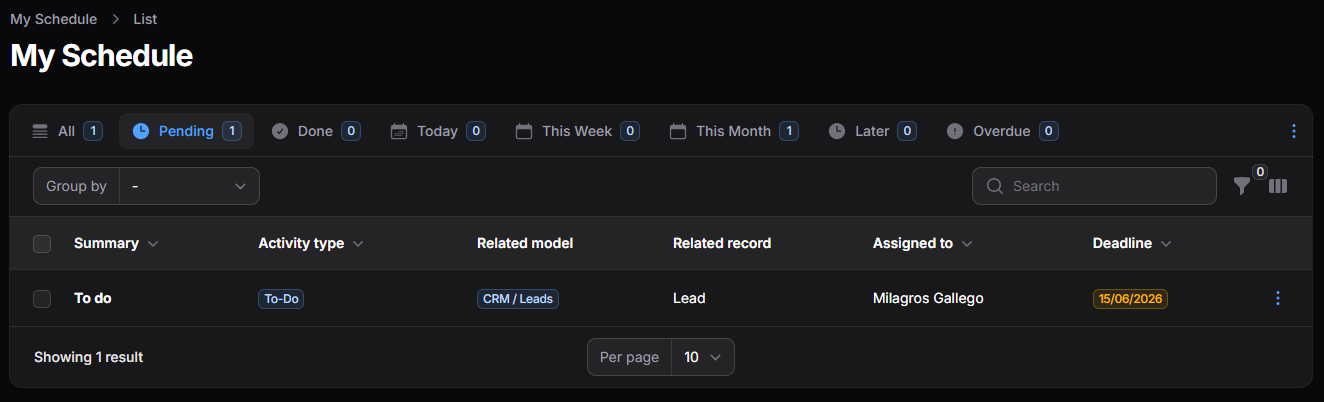
Figure 7. Activity recorded in My Schedule
Every activity created from the Chatter will automatically appear in Activities → My Schedule, centralizing its tracking within the system.
Actions on an Activity
Once created, it is possible to access an activity’s information to review, modify, or update its status.
To do this, you can:
- Click directly on the corresponding record within the list.
- Use the Action Group (⋮) menu available at the end of each row.
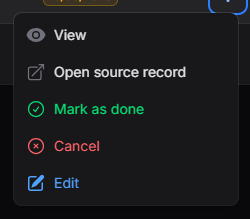
Figure 8. Action group available for an activity
Activity View
The View option allows access to the full details of an activity.When entering, all registered information will be displayed, including general data, the related record, and audit information.
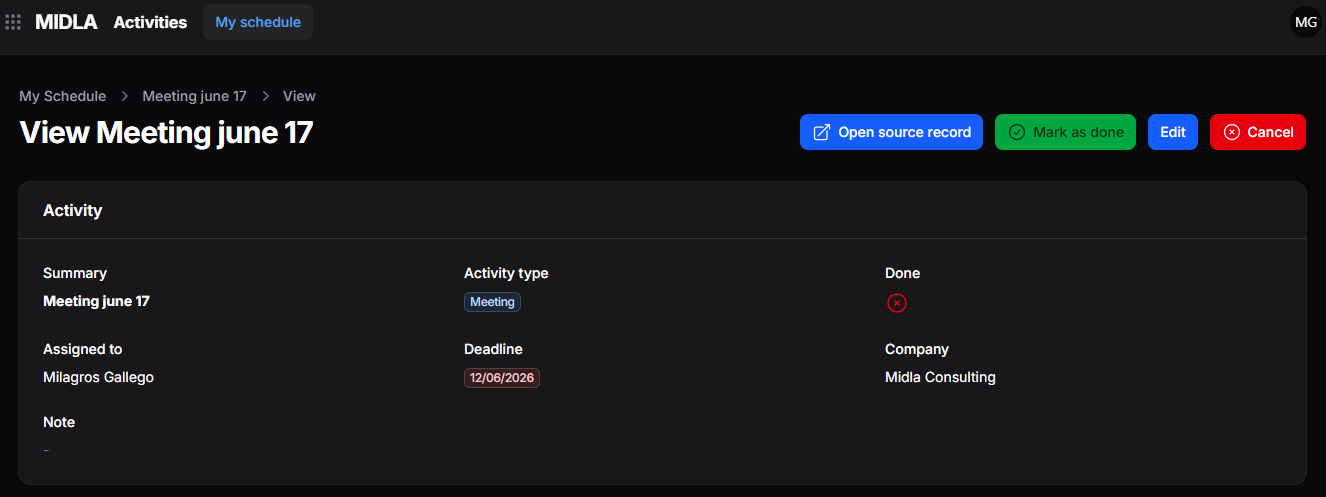
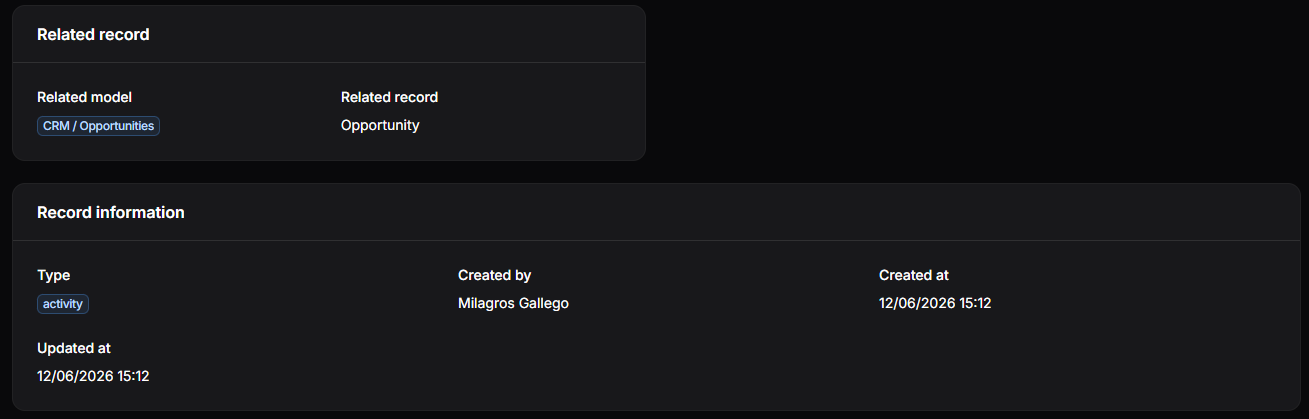
Figure 9. Activity view
Available Actions
The following actions are available from the activity detail view:
Figure 10. Available actions in the activity view
Open Source Record
The Open Source Record option allows direct access to the original record linked to the activity.
This makes it possible to review the complete information of the record and continue its follow-up from the corresponding module.
For example, if the activity was created from a Lead, this option will automatically open that record.
Mark as Done
The Mark as Done option allows an activity to be marked as completed.
When selected, a window will open where it is mandatory to register a Feedback in order to keep a record of the result of the completed activity.
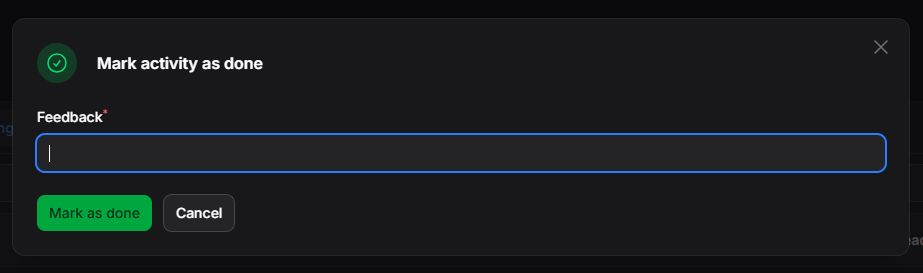
Figure 11. Confirmation to mark an activity as done
Available Actions
- Mark as Done: saves the feedback and marks the activity as completed.
- Cancel: closes the window without making changes.
Once completed, the activity will no longer appear in the Pending view and will automatically move to the Completed view.
The registered feedback will be stored in the Chatter of the related record.
Cancel
The Cancel option allows an activity to be deleted when it is no longer necessary to continue its follow-up.
When selected, the system will display a confirmation window.
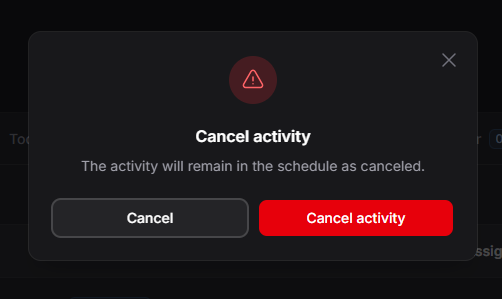
Figure 12. Activity cancellation confirmation
Available Actions
- Cancel Activity: deletes the activity.
- Cancel: closes the window without deleting it.
Once canceled, the activity will no longer appear in Activities or in the Chatter of the related record.
Edit
The Edit option allows modifying the information registered in an activity.
When selected, a form will open where its main data can be updated.
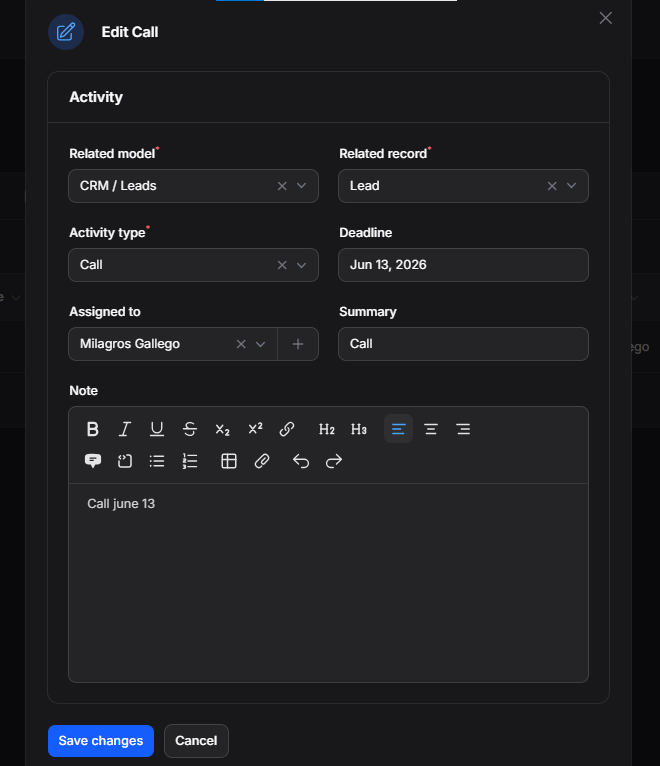
Figure 13. Activity edit form
Editable Fields
- Related Module: the module to which the activity belongs.
- Related Record: the associated record.
- Activity Type: the assigned activity type.
- Due Date: the deadline for completion.
- Assigned To: the responsible user.
- Summary: the title or short description.
- Note: additional observations.
Available Actions
- Save Changes: saves the modifications made.
- Cancel: closes the form without saving changes.
Any modification made to an activity will automatically be reflected in the Chatter of the related record.